A little bit of history
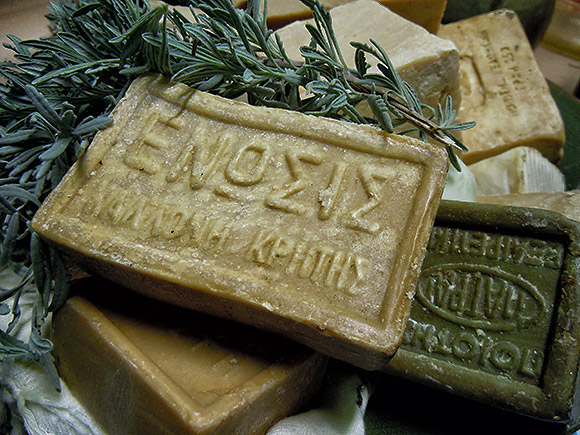
According to stories that survive since antiquity, soap making was first invented in the island of Lesvos and was quite accidental. In these times, animals were cremated as a sacrifice to the gods and their remains (animal fat and ashes) accumulated on the stone altars. In periods of heavy rains, the water washed away the remains of the sacrifices from the altars into the river where women washed their clothes. It was then observed that when the river water acquired a yellowish colour after the rain, the clothes became cleaner. The famous poet of the island Sappho, was one of the first to record this observation and history honoured her by naming the chemical name for soap making after her: saponification.
Centuries passed since Sappho’s time and the process of soap-making evolved and became more sophisticated with the acquisition of new knowledge and tools. By the second half of the 15th century, soap production had spread in Europe with popular manufacturing centres in France (especially in Marseilles) and London. The soap of Marseilles is still very popular, but what most modern consumers don’t know is that for a long period the famous Marseilles soap has heavily depended on Cretan olive oil due to disastrous olive harvests in France at the end of the 17th century. At this period, Crete was under Ottoman rule and the first soap factories were owned by Turks. The high demand for Cretan olive oil doubled its exportation throughout the 18th and 19th centuries and at the same time soap making became a growing industry in Crete with about 45 soap factories on the island and the construction of large ships to transport soap to Syria, Asia Minor and other regions of the Mediterranean.

However, the use of olive oil for soap making was nothing new for the people of the island who used it for cleansing purpose since Minoan times. According to historical evidence, Minoans used to cleanse themselves with olive oil (without any further processing) and indeed, olive oil has great cleansing and nurturing qualities for the skin. See for yourself: put some olive oil on a cotton pad at the end of the day, pass it through your face and see what will come out!
Olive oil was used for DIY soap making for many centuries in Crete, as before the time of abundance we live in today, people had to cover their everyday needs with limited resources. In this sense, recycling is nothing new either. Once upon a time, Cretan women gathered the inferior grades of olive oil accumulated at the bottom of the barrels (pomace) to make large quantities of homemade soap. Sometimes this was a collective activity where all the women of the village participated and shared the soap at the end of the process.

The tradition (fortunately) continues
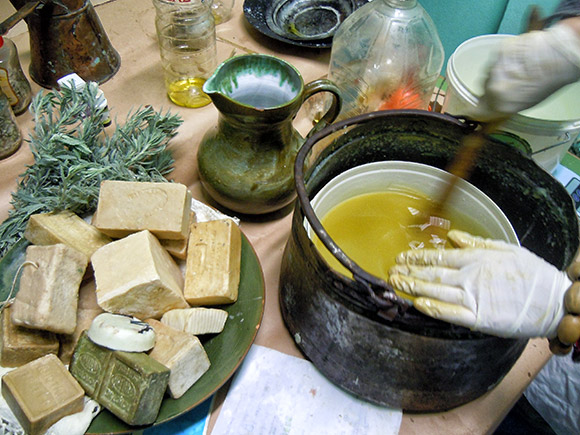
Traditional soap making practices and recipes still survive thanks to women like Despina Mathioudaki, who learned how to make soap from her grandmother and now organizes workshops and educational seminars about soap making and Cretan nutrition.
We attended one of her workshops in the cooperative space of ‘Koukoutsi’ in Heraklion and we now share her wisdom with you! Ready to learn how to make your own soap, the Cretan way?
The recipe that follows is based on the cold method, which is considered much better than the warm method used in large industries, as in this way the soap keeps all its glycerine (usually separated in conventional soaps, to be sold in the pharmaceutical and cosmetic industries), which makes the skin softer. Based on the natural moisturising properties of olive oil, Cretan soap is mild, healthy, chemical-free, full of vitamin E, long-lasting and suitable for any skin. It can be enriched with herbal extracts (lavender, thyme, rosemary etc.), essential oils and other essences or oils (like almond oil), depending on the needs of your skin or your preferences.

Make your own aromatic soap
So, let’s start with the basics. Cold process soap making requires exact measurements and therefore a scale is needed. It also requires ‘clean’ olive oil (not recycled from cooking) as we want the best quality for our skin, and the herbs used must be dried. As for the water, it is recommended that we use rain water, distilled water or water mixed with ash, without salts that are hard on the skin.
The ingredients and tools you will need for this recipe are the following: a large bucket where you will mix all the ingredients (4-5 liters capacity), a ladle (preferably wooden), 810gr of water, 292gr caustic soda, 2410gr of clean olive oil, herbs or essence oils of your choice, a baking pan, empty yogurt cases or whatever else you want to use as a mold, and most importantly: plastic gloves to protect your skin from the caustic soda. Remember, you need to be precise with the quantities, which will give you around 30 soaps!
 Step 1: Bring the water to boil.
Step 2: Remove from fire and add the herbs (about 2 handfuls). Let it cool and remove the herbs from the water before you place it into your bucket. Do not put the herbs into your soap unless you want it scratchy!
Step 3: Add the caustic soda carefully (attention: wear the plastic gloves and do not add the caustic soda when the water is still hot!) and stir for a few minutes. It is better to perform this task in an open air space and keep your face away from the fumes (pregnant women should avoid this step altogether).
* These first steps can ideally be completed the night before, so that the mixture 'rests'. The next morning you may continue with the following steps.
Step 4: Add the olive oil to the mixture.
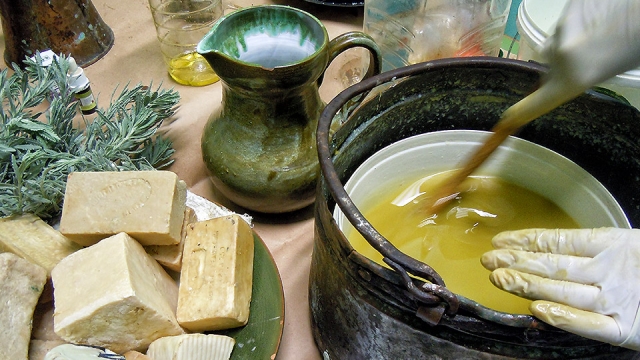
Step 5: Stir! Now, if you want to do this traditionally, you will have to stir all the ingredients in the bucket for about an hour or two, until it is thick like a bechamel sauce. However, since some modern inventions make our lives easier, we see no harm to use a hand blender and get over with the stirring in about 15-30 minutes!
Step 6: Essential oils (if you want to add any) must be added at the last stages of stirring, before putting your not-so-soon-to-be soap into its molds. You will need about 5ml of essential oil (ideally from the same herb you used from the herbal extract, ex. lavender). Finally, empty the thick mixture from the bucket into the molds, which can be a baking pan covered with parchment paper to protect it, empty yogurt cases, or whatever else can give you a nice soap shape. Do this immediately after you are done, otherwise your mixture will soon dry in the bucket (and then you would have to warm it again to remove it).

Your soap is ready! Well, almost…actually you need to wait for about 10 days to remove the soap from the molds by turning them upside down on a table. If you used the baking pan, you will need to cut the soap into bars at this time and store them in a dry and dark place until it matures, that is, in about 3 months! If you see a white powder covering your soap, do not worry, actually it's a good thing. It means that your soaps are mature. And remember, the more mature your soap is, the better!


